
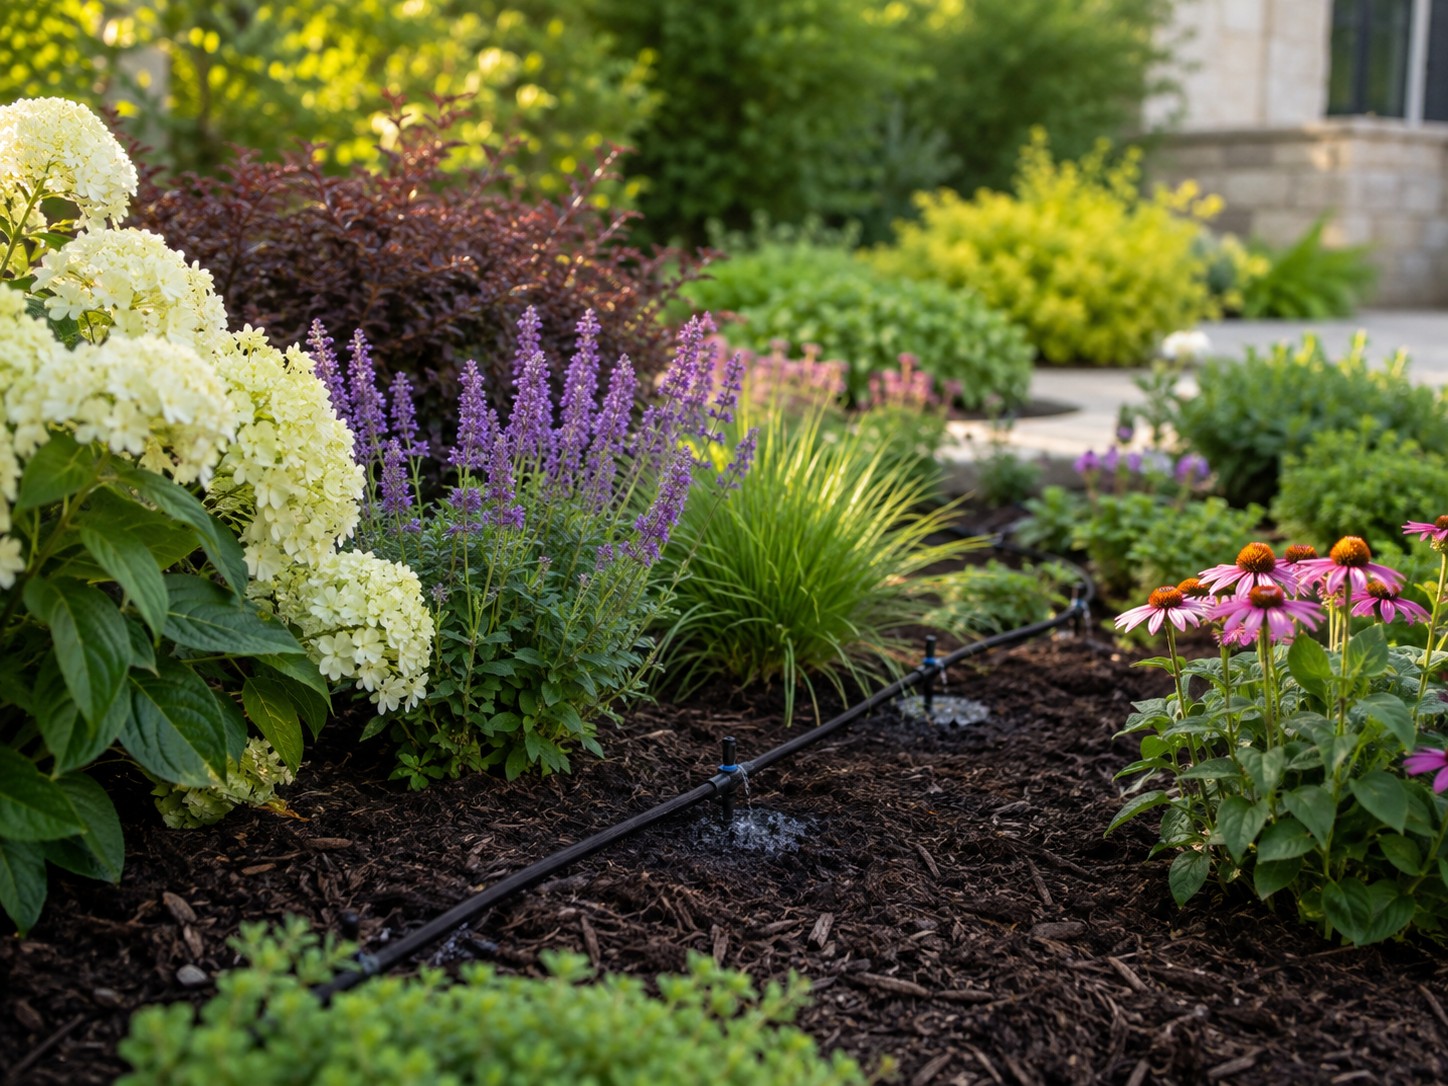
The Beginner’s Guide to Drip Irrigation
Dragging a hose around the yard works, but it gets old quickly.
Drip irrigation is a simple way to deliver water directly to the soil around your plants. Instead of spraying an entire garden bed, it releases water slowly near the root zone where plants can actually use it.
A drip system can look intimidating when you see all the tubing, fittings, and emitters at the store. But a basic residential system is much simpler than it appears.
What Is Drip Irrigation?
Drip irrigation uses flexible tubing to carry water through the garden and release it slowly through small emitters or dripline.
Unlike a sprinkler, which sends water through the air, drip irrigation applies water close to the ground.
That can help:
- Reduce evaporation
- Put water closer to plant roots
- Keep foliage drier
- Reduce overspray onto walks and fences
- Water individual planting areas more precisely
- Make routine watering easier
It is especially useful in flower beds, shrub borders, vegetable gardens, and around newly planted landscaping.
The Basic Parts
A simple drip-irrigation system usually includes a few basic components.
Water Source
Most small systems connect to an outdoor faucet or an existing irrigation connection.
Backflow Preventer
A backflow preventer helps keep irrigation water from flowing backward into the household water supply.
Depending on your setup and local requirements, this may already be incorporated into your irrigation system.
Pressure Regulator
Drip components operate at lower pressure than many household faucets provide.
A pressure regulator reduces the water pressure to a level appropriate for the system.
Filter
Small drip openings can clog.
A filter helps catch debris before it reaches the emitters.
Main Tubing
This larger flexible tubing carries water through the planting area.
Common systems use polyethylene tubing that can be routed along the ground and hidden beneath mulch.
Emitters or Dripline
This is where the water leaves the system.
You may use:
- Individual drip emitters
- Dripline with emitters built into the tubing
- Adjustable emitters
- Small micro-bubblers in certain situations
For a typical garden bed with many plants, dripline is often the simplest choice.
Dripline vs. Individual Emitters
Both approaches work, but they serve slightly different purposes.
Dripline has emitters spaced at regular intervals along the tubing.
It works well for:
- Flower beds
- Groundcovers
- Perennial borders
- Closely planted shrubs
- Vegetable beds
Individual emitters deliver water at specific points.
They can be useful for:
- Widely spaced shrubs
- Containers
- Individual trees
- Plants with very different water needs
For a densely planted residential garden, dripline is often easier because it waters the broader root zone rather than one tiny point.
Plan the Bed Before Buying Parts
Before buying tubing, look at the area you want to water.
Notice:
- Where the water source is located
- The shape of the bed
- How wide and long the bed is
- Where larger plants are located
- Whether the bed contains plants with very different water needs
Sketching the bed on paper can help.
You do not need an architectural drawing. A rough shape with measurements is enough.
Think in Watering Zones
Plants with very different needs should not necessarily be watered on the same schedule.
For example, a bed containing moisture-loving plants may need a different irrigation zone than a bed filled with drought-tolerant plants.
Whenever practical, group plants with similar water needs together.
This makes both irrigation and general garden care easier.
How to Lay Out Dripline
For a typical garden bed, run dripline through the planted area in loose parallel lines or gentle curves.
The goal is to distribute water across the root zone rather than run one line directly beside every stem.
Spacing depends on your:
- Soil type
- Dripline emitter spacing
- Water pressure
- Planting density
- Climate
In heavier soil, water tends to spread outward more before moving downward.
In sandy soil, water may move downward more quickly and spread less horizontally.
That means sandy soil may require closer dripline spacing.
Do Not Put the Line Against the Stem
Roots generally extend beyond the exact point where a stem emerges from the soil.
Place irrigation where the active roots are growing rather than pressing emitters directly against stems or trunks.
For larger shrubs and trees, the root zone expands outward as the plant grows.
Your irrigation layout may need to expand with it.
Cover the Tubing With Mulch
Drip tubing can usually be tucked beneath mulch once the system has been tested.
Mulch helps:
- Hide the tubing
- Protect it from sunlight
- Reduce evaporation
- Keep the bed looking finished
Do not bury the tubing deeply in the soil.
Keeping it near the surface makes repairs and adjustments much easier.
Test Before You Cover Anything
Before hiding the system under mulch, turn the water on.
Walk through the entire area and check for:
- Leaking fittings
- Kinked tubing
- Emitters that are not flowing
- Areas receiving too little water
- Connections that have popped loose
It is much easier to fix problems while everything is still visible.
How Long Should Drip Irrigation Run?
There is no universal number of minutes.
Runtime depends on:
- Emitter flow rate
- Soil type
- Weather
- Plant size
- Plant age
- Sun exposure
- Recent rainfall
Instead of choosing a runtime and assuming it is correct, test the soil after watering.
You want moisture to penetrate into the root zone.
If only the top inch is damp, the system may need to run longer.
If the soil remains saturated for long periods, you may be running it too long or too frequently.
Water Deeply, Then Wait
Drip irrigation works especially well when it is used to provide a thorough watering followed by time for the soil to begin drying appropriately.
For established plants, this is often better than automatically running the system for a few minutes every day.
New plants may require more frequent watering while their roots establish.
As always, check the soil rather than relying entirely on the calendar.
Use a Timer
A hose-end timer can make a simple faucet-connected drip system much easier to manage.
Timers allow you to control:
- Start time
- Watering days
- Runtime
- Frequency
More advanced irrigation controllers can also adjust watering based on weather conditions.
Automation is useful, but it does not eliminate the need to occasionally check the garden.
Adjust for Rain
Do not continue irrigating simply because the timer says it is watering day.
After substantial rainfall, skip or delay irrigation when appropriate.
A rain sensor, smart controller, or simple manual adjustment can prevent unnecessary watering.
Check the System Regularly
Drip irrigation is low maintenance, but not no maintenance.
Occasionally inspect it for:
- Clogged emitters
- Damaged tubing
- Loose fittings
- Chewed lines
- Tubing moved by gardening work
- Plants that have outgrown the original layout
A quick inspection at the beginning of the growing season can catch many problems.
Flush the Lines
Many systems have an end cap that can be opened so water flows freely through the tubing.
Flushing the system occasionally helps remove sediment and debris.
Do this according to the needs of your particular system and water quality.
Watch What Happens as Plants Grow
A system that works perfectly when a bed is newly planted may need adjustment a few years later.
Shrubs become wider.
Root systems expand.
Perennials fill gaps.
New plants get added.
Think of drip irrigation as part of the garden rather than a permanent installation you never touch again.
Common Drip Irrigation Mistakes
Avoid these common problems:
- Running the system for only a few minutes at a time
- Assuming every plant needs the same amount of water
- Placing emitters directly against stems
- Covering the system before testing it
- Forgetting to adjust watering after rain
- Allowing clogged emitters to go unnoticed
- Installing tubing so tightly that it cannot be moved as plants grow
- Treating a timer as a substitute for checking the soil
A Simple Starter Setup
For a small residential garden bed, a basic system may be as simple as:
- Connect to the water source
- Add the appropriate backflow prevention, filter, and pressure regulation
- Run main tubing to the bed
- Lay dripline throughout the root zone
- Secure the tubing
- Cap or flush the ends
- Turn the system on and check every section
- Adjust the layout as needed
- Cover the tubing lightly with mulch
- Check soil moisture after the first few watering cycles
You can always expand the system later.
Start Simple
You do not need the most complicated irrigation system available.
The goal is simply to get the right amount of water to the roots with less waste and less work.
Start with one bed. Learn how the water moves through your soil. Adjust the layout and runtime until the plants are receiving a deep, thorough watering.
Once you understand that first section, expanding drip irrigation to other garden beds becomes much easier.
Leave a Reply