
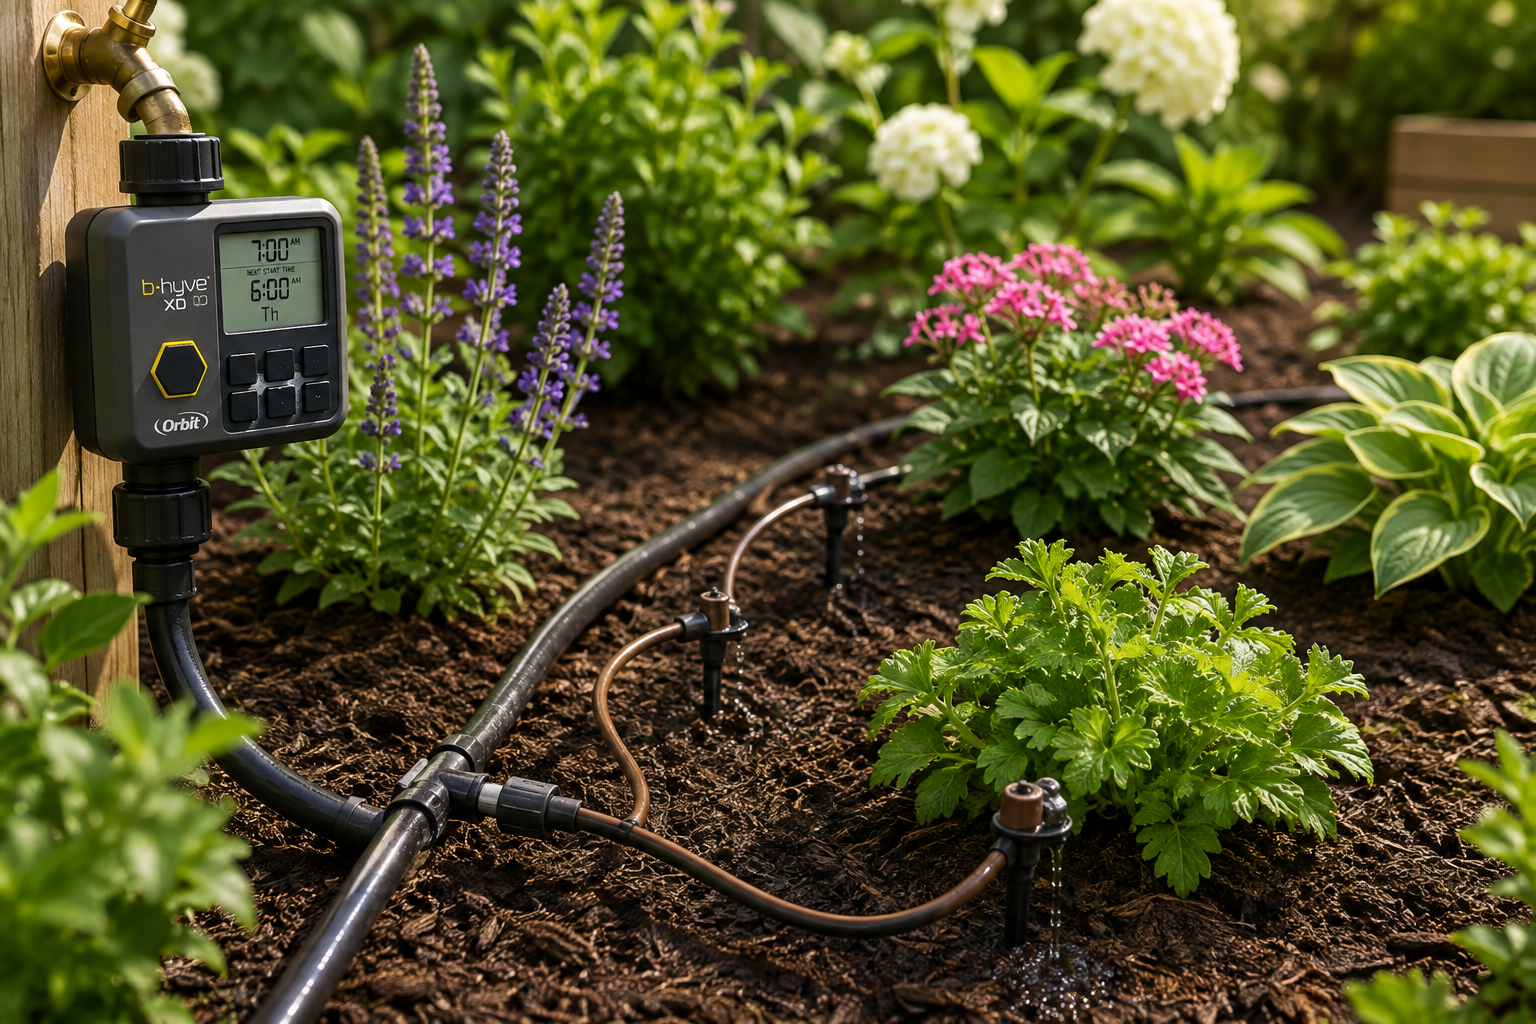
Drip irrigation can look much more complicated than it really is.
There are tubes, fittings, emitters, timers, pressure regulators, filters, stakes, adapters and enough little plastic pieces to make the whole thing feel like a plumbing project.
But for most home gardens, the system is actually pretty simple.
You need a way to connect to water, a main line to carry it through the garden, smaller tubing or emitters to deliver water to the plants, and a few basic parts that keep the system working properly.
That’s it.
The trick is understanding what each piece does so you don’t buy a pile of parts you don’t need.
Start With the Water Source
Most small drip systems begin at a standard outdoor hose faucet.
From there, the system usually needs a few components before the tubing ever reaches the garden bed.
Depending on your setup, these may include:
- a backflow preventer
- a filter
- a pressure regulator
- a hose-to-drip adapter
- an optional timer
These pieces are not exciting, but they matter.
Drip irrigation works best at lower pressure than a typical outdoor faucet provides, and the small emitters can clog if debris gets into the line.
A good starter kit will often include several of these components already.
A Timer Is Optional, but Very Useful
You can absolutely run drip irrigation manually.
But one of the biggest advantages of drip irrigation is consistency, and a hose timer makes that much easier.
A timer lets you decide:
- what days the garden gets watered
- what time watering starts
- how long the system runs
That can be especially helpful during hot weather or when you’re away from home.
What we like: Orbit B-hyve XD Hose Faucet Timer
The Orbit B-hyve XD Bluetooth Hose Faucet Timer is one example of a timer that attaches directly to an outdoor faucet.
It can be programmed manually or through the B-hyve app using Bluetooth.
For a simple flower bed or raised-bed system, this type of timer can automate watering without requiring a full underground irrigation controller.
You do not need a smart timer for drip irrigation, though.
A basic programmable hose timer can work perfectly well if you prefer something simpler.
The Main Tubing
Most garden drip systems use larger tubing as the main supply line.
A common size is 1/2-inch distribution tubing.
Think of this as the backbone of the system.
It runs from the water source through or alongside the garden bed and carries water to the smaller lines and emitters.
The tubing is flexible enough to follow gentle curves and can usually be secured to the soil with landscape stakes.
For a small bed, you may only need one main line.
For a larger garden, the tubing can branch into several areas.
The Smaller Tubing
Smaller 1/4-inch tubing is often used to carry water from the main line directly to individual plants or groups of plants.
This is especially useful when plants are spaced farther apart.
For example, you might run the larger tubing along the back of a shrub bed and then use short pieces of 1/4-inch tubing to reach each shrub.
This keeps the system tidy while allowing you to place water exactly where it is needed.
Emitters Deliver the Water
Emitters control how water actually leaves the system.
There are several types, and this is where drip irrigation can start looking complicated.
For most home gardens, you only need to understand a few basic options.
Drippers
Individual drippers release water slowly at a specific point.
They work well for:
- shrubs
- roses
- individual perennials
- container plants
Drippers are often rated by how many gallons of water they release per hour.
Micro-bubblers
Micro-bubblers release water over a slightly wider area.
They can be useful around:
- larger shrubs
- newly planted trees
- groups of perennials
Micro-sprays
Micro-sprays distribute water over a broader area.
They can work well for closely planted flower beds, but they behave more like miniature sprinklers than true drip emitters.
They also wet foliage and lose more water to evaporation, so they are not always the first choice.
You Do Not Need Every Kind of Emitter
One of the easiest mistakes is buying every emitter that comes in the irrigation aisle.
You usually don’t need them.
Choose the type that matches the way your garden is planted.
A shrub border may work beautifully with individual drippers.
A densely planted perennial bed may be easier with dripline or closely spaced emitters.
Containers may need their own short tubing and dripper.
Keep the system as simple as possible.
A Starter Kit Can Make the First System Easier
If you have never installed drip irrigation before, a complete starter kit can save a lot of guesswork.
What we like: Rain Bird Landscape & Garden Drip Watering Kit
The Rain Bird Landscape & Garden Drip Watering Kit includes many of the basic components needed to build a small garden system.
It contains:
- 1/2-inch tubing
- 1/4-inch tubing
- drippers
- micro-bubblers
- micro-sprays
- a pressure regulator
- a backflow preventer
- connectors and stakes
That makes it useful for learning what the different parts do without having to purchase every piece separately.
You may not use every component in the box, and that’s okay.
The point of a starter kit is convenience, not using every fitting simply because it came with the system.
What You Can Skip at First
You do not need to build the perfect irrigation system on day one.
For a basic home garden, you can usually skip:
- complicated multi-zone controllers
- dozens of specialty fittings
- multiple emitter styles
- permanent underground installation
- elaborate Wi-Fi irrigation systems
Start with one bed.
Learn how the tubing behaves, how much water your plants receive and how long the system needs to run.
You can always expand it later.
How Long Should Drip Irrigation Run?
There is no universal answer.
The amount of time depends on:
- your soil
- the type of plants
- emitter flow rate
- temperature
- rainfall
- how established the plants are
Drip irrigation is designed to water slowly and deeply.
Rather than automatically running it every day for a few minutes, it is usually better to water long enough for moisture to reach deeper into the root zone.
After the system runs, check the soil.
Dig down several inches and see how far the moisture has traveled.
That will tell you much more than the clock.
Don’t Forget to Check the System
Drip irrigation is efficient, but it is not maintenance-free.
Every so often:
- check emitters for clogs
- inspect tubing for leaks
- make sure fittings are still secure
- move emitters as plants grow
- flush the system if needed
Plants change.
A small shrub may eventually need more water than it did when the system was first installed.
Your irrigation setup should change with the garden.
Keep It Simple
For most home gardens, a basic drip irrigation system really comes down to:
Water source → pressure control → main tubing → smaller tubing or emitters → plants.
A timer makes the system more convenient.
A starter kit makes the first installation easier.
But neither needs to turn into an expensive or complicated project.
Start with the plants you actually need to water and build the system around them.
That is usually the simplest — and most useful — way to begin.
Leave a Reply